Shadowsocks Setup Guide for Windows
About Shadowsocks
- Shadowsocks is an open-source encrypted proxy project, Typically, the client software will open a socks5 proxy on the machine it is run, which internet traffic can then be directed towards, similarly to an SSH tunnel.
- Shadowsocks uses a self-designed protocol for secure communications. The encryption algorithms include AES, Blowfish, IDEA, and RC4. No handshaking is needed except for creating a TCP connection. Each request only forwards one connection and does not need to maintain the state of “always connected”, so it is relatively power-efficient on mobile devices. All traffic is algorithmically encrypted, allowing you to choose your own algorithm.
- Clients are available on multiple major operating systems and platforms, including Windows, OSX, Android, Linux, and iOS systems and routers (OpenWrt).
System Requirements
Before you install, always make sure that your system meets the minimum system requirements.
You need Windows 7 or later to run Shadowsocks. If your operating system is older, upgrade to Windows 7 or later.
Installing Shadowsocks
Follow the instructions below to download and install Shadowsocks on Windows.
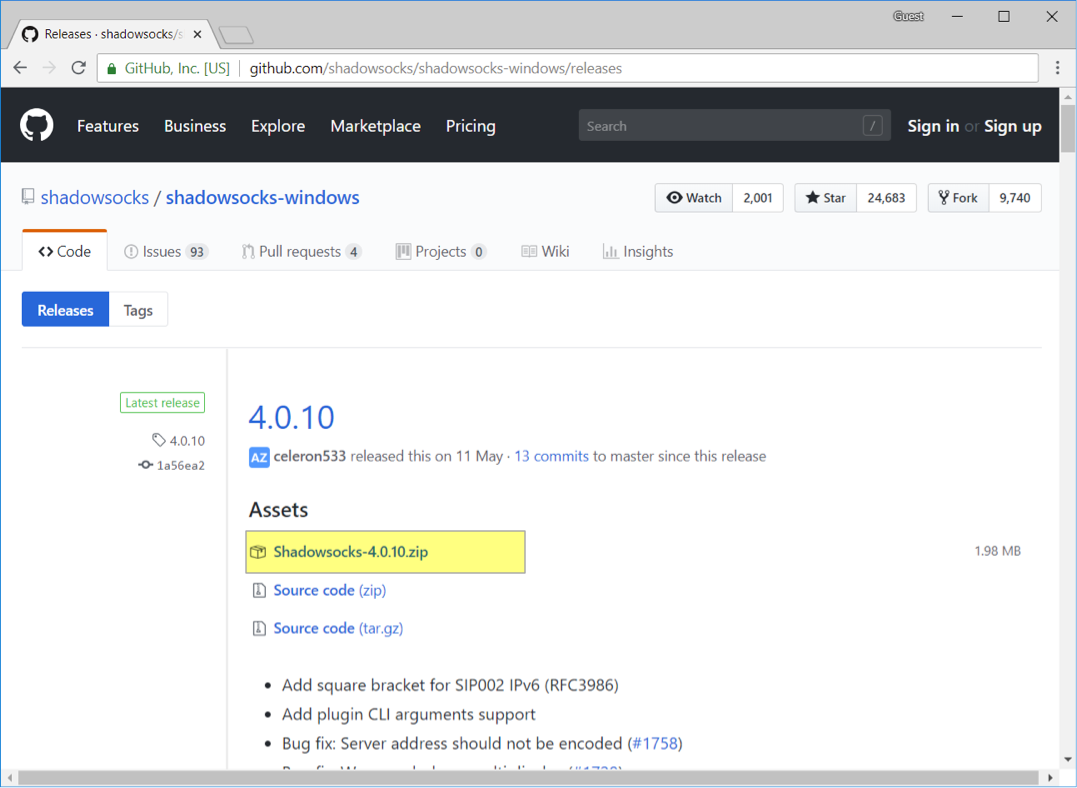
1. Download the client
Go to Shadowsocks download page.
Click on the latest version of Shadowsocks-x.x.x.zip to download (x.x.x is the version number).
2. Unzip the client
Right-click on Shadowsocks-x.x.x.zip compressed file > “Extract all”. Click on “Browse” to select the directory where you want to unzip to> “Show extracted files when complete > “Extract”.
Double-click on Shadowsocks.exe.
3. Install the .NET Framework
After trying to run Shadowsocks.exe, you may see a dialog on your computer similar to the following one::
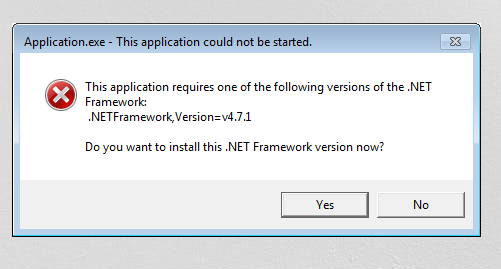
It means that your computer needs to install the .NET Framework. Please click here to download the latest version of the .NET Framework.
Configure Shadowsocks Account
On your computer, do the following:
- Drag
gui-config.jsonto the same directory asShadowsocks.exe.
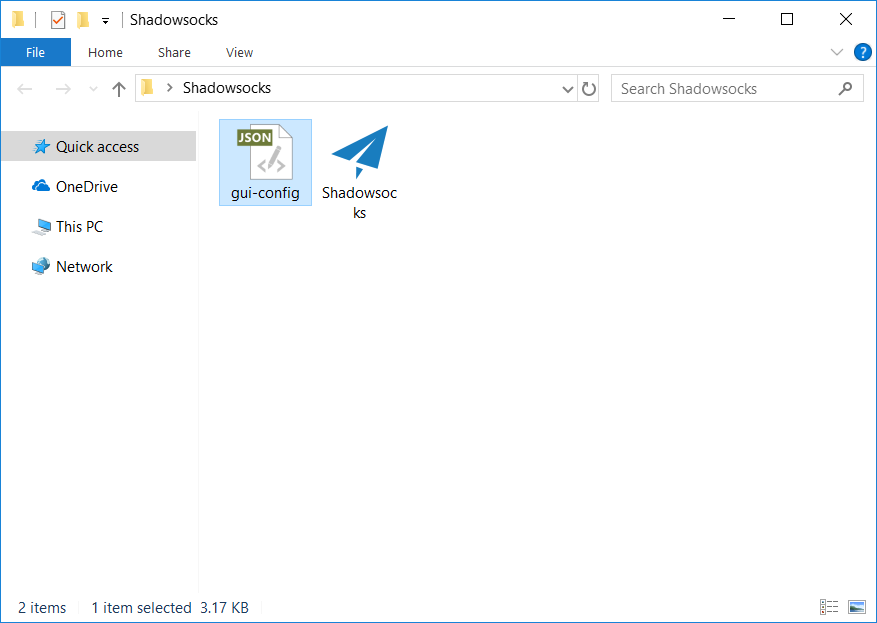
Double-click on Shadowsocks.exe to see that the node information and account have been automatically filled.
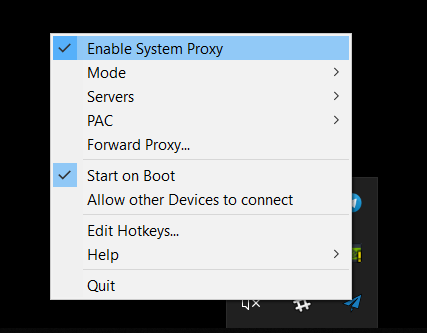
- On your system tray, right click
 > “Enable System Proxy”.
You can also add nodes individually by QR code. On your computer, do the following:
This QR code also applies to other clients.
- On your system tray, right click
 > “Servers”> “Scan QR Code from Screen”.
 - Click “Enable System Proxy”.

Configure System Proxy Mode
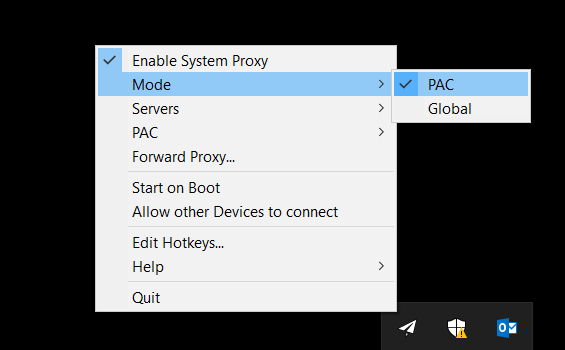
- On your system tray, right click
 > “Mode” > “PAC Mode”.
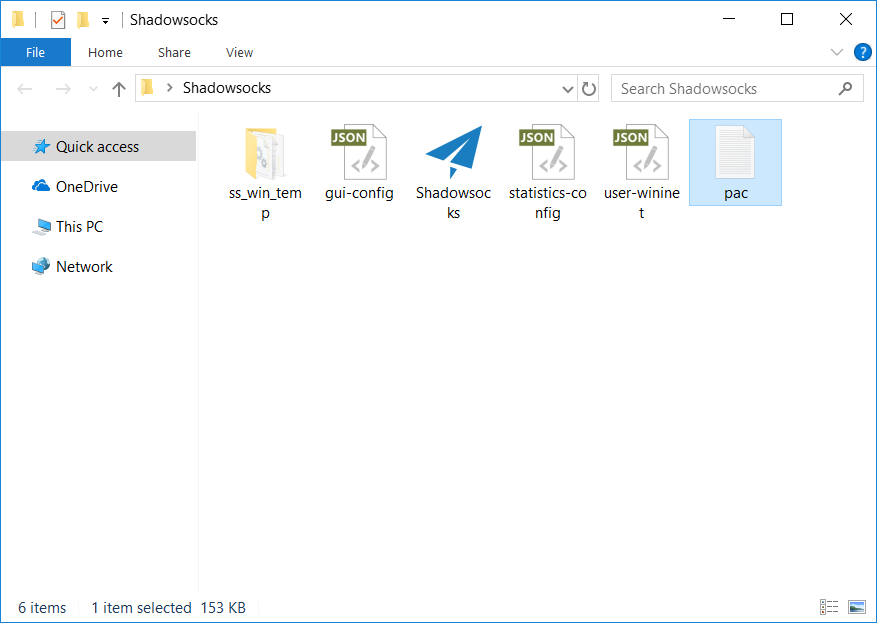
- If you cannot access the website using the PAC mode, go to here to download the “pac configuration file” and drag
pac.txtin the same directory asShadowsocks.exe.
Attention
- Global mode means that most of the traffic in the computer will go through a proxy, and it is not recommended for daily use, because it will easily let the torrent downloads through our proxy, and causing a serious consequence by receiving ISP complaints.
- Load Balance and High Availability are used to spread traffic and improve usability. It is not for speeding up yor internet. If a node has better connection quality, it is recommended to select that server directly.
- It is recommended to use PAC mode, which allows automatic proxy and access to non-blocked websites without proxying. (But in the Shadowsocks Win 2.x version, the built-in GFWList link has expired, causing the PAC regulations cannot be updated.)
- You can choose to download the PAC file from our website, or when you encounter a website that cannot be accessed, edit the local PAC file to add that website address.
